Embedded Wallets
Introduction
Embedded Wallets allow receivers to receive disbursements without needing to download or manage a separate wallet application. When you create a disbursement with Embedded Wallets as the target wallet provider, the SDP automatically creates a lightweight, passkey-secured smart contract wallet for each receiver.
Why Use Embedded Wallets?
Embedded Wallets significantly reduce friction for receivers who don't have an existing Stellar wallet:
- No App Download Required: Receivers don't need to download a separate wallet application
- Passwordless Authentication: Uses passkeys (biometric or device-based authentication) instead of passwords
- Phishing-Resistant: Built on WebAuthn standards that prevent credential theft
- Simple User Experience: Receivers can claim their funds with just a few clicks
Key Concepts
Smart Contract Wallets: Embedded Wallets are Stellar smart contract accounts that are deployed on-chain when a receiver creates their passkey. These contracts are controlled by the receiver's passkey credential.
Passkeys: A modern authentication method that replaces passwords with cryptographic keys stored securely on the user's device, unlocked with biometrics (fingerprint, Face ID, etc.) or device PIN.
SEP-45: A Stellar web authentication protocol for contract accounts that lets wallets prove control of a smart contract wallet and obtain a JWT session token from a service. The SDP uses SEP-45 to verify that receivers control their embedded wallets.
What are Passkeys?
Passkeys are a replacement for passwords that provide stronger security and a better user experience. Instead of remembering and typing a password, users authenticate with biometrics (like fingerprint or facial recognition) or their device's PIN/pattern.
How Passkeys Work
When a receiver creates an embedded wallet:
- The browser or device generates a cryptographic key pair (public key and private key)
- The private key is stored securely on the receiver's device and never leaves it
- The public key is sent to the SDP and used to create the smart contract wallet
- When signing in later, the receiver uses biometrics to unlock their private key
Why Passkeys are More Secure
Phishing-Resistant: Unlike passwords, passkeys are cryptographically bound to your domain. Even if a receiver visits a fake website, their passkey won't work there.
Automatically Unique: Each passkey is unique per service. There's no risk of password reuse across sites.
Breach-Resistant: The SDP only stores public keys. Even if the database is compromised, attackers cannot use public keys to authenticate.
No Weak Passwords: Users can't create weak or easily-guessed credentials. All passkeys use strong cryptography.
For more details about passkey technology, visit passkeys.dev or read about the WebAuthn specification.
How It Works
The Embedded Wallet flow consists of several steps that happen automatically:
- Disbursement Creation: An administrator creates a disbursement and selects "Embedded Wallet" as the wallet provider
- Invitation Sent: The SDP sends an invitation link to each receiver via SMS or email
- Passkey Creation: The receiver clicks the link and creates a passkey using their device's biometric authentication
- Wallet Deployment: The SDP deploys a smart contract wallet on the Stellar network, controlled by the receiver's passkey
- Verification: The receiver completes identity verification (e.g., entering an OTP or date of birth)
- Payment Transfer: Once verified, the SDP automatically transfers the disbursement funds to the receiver's contract wallet
Behind the Scenes
When a receiver logs in with their passkey, several things happen:
- The frontend uses WebAuthn to authenticate the receiver with their biometric or device PIN
- The backend verifies the authentication using the stored public key
- A SEP-45 JWT session token is generated to prove the receiver controls the wallet
- The SDP sponsors transactions on behalf of the receiver, covering all network fees
- Payments are made using Stellar Asset Contract (SAC) transfers to the smart contract address
Prerequisites
Before using Embedded Wallets, ensure your SDP instance is properly configured:
-
Backend Configuration: Embedded Wallets require specific environment variables to be set. See the Embedded Wallets Configuration section in the Advanced Configuration guide.
-
Frontend HTTPS Requirement: The frontend dashboard must be served over HTTPS for passkeys to work. WebAuthn requires a secure context and will not function over plain HTTP.
-
Network Selection: Ensure you've deployed the embedded wallet contract to your target network (testnet or mainnet) and have the correct WASM hash configured.
For detailed configuration instructions, see the Embedded Wallets Configuration section.
Using Embedded Wallets
Step 1: Create a Disbursement with Embedded Wallet
When creating a new disbursement, select "Embedded Wallet" as the wallet provider in the disbursement details form.
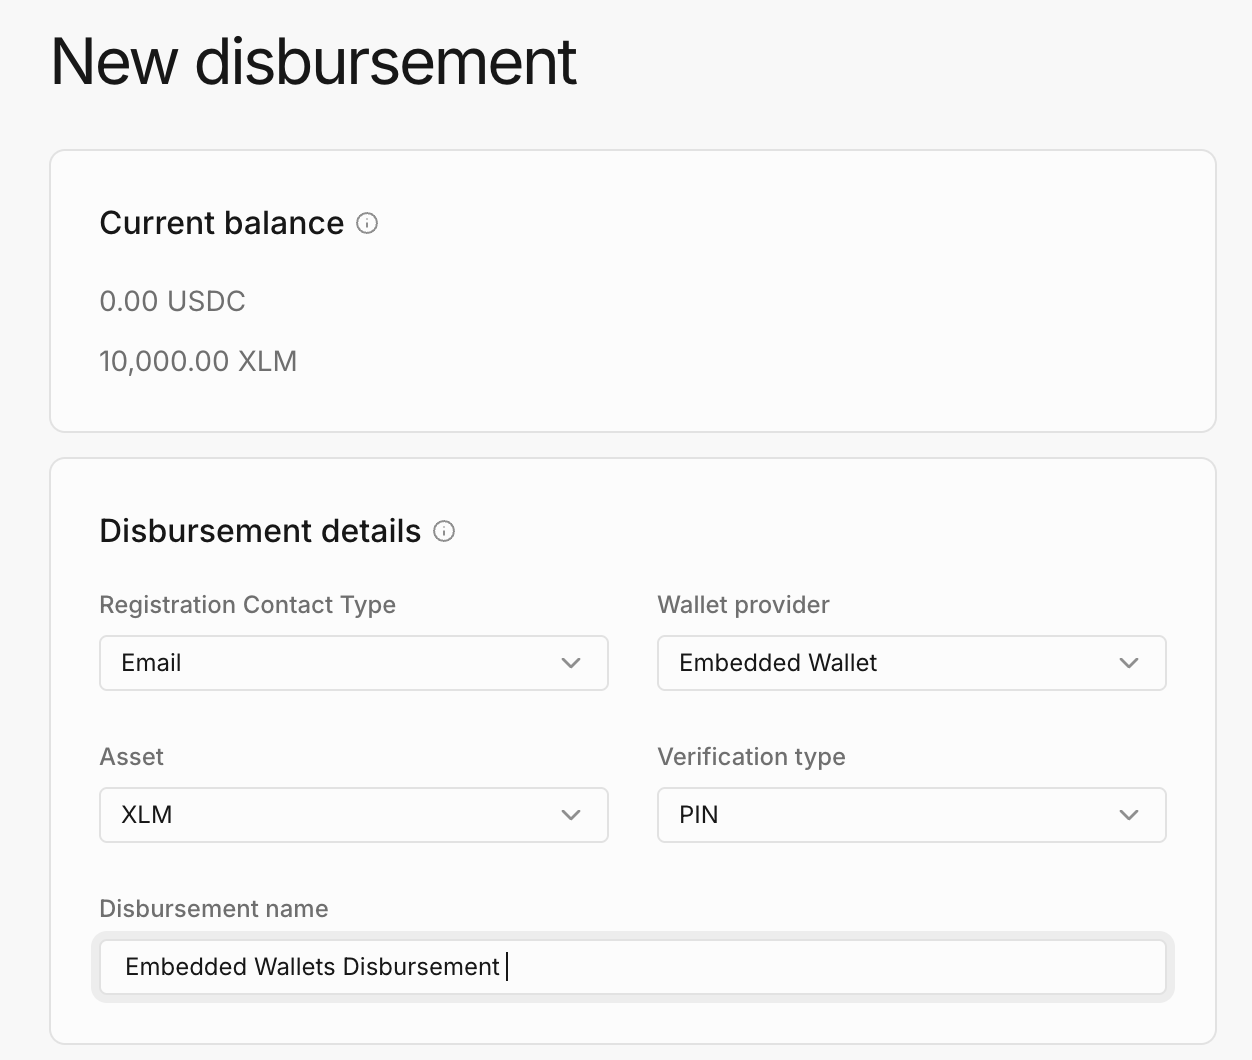
What to configure:
- Registration Contact Type: Choose how receivers will be contacted (Email or SMS)
- Wallet Provider: Select "Embedded Wallet" from the dropdown
- Asset: Choose the asset to disburse (e.g., USDC, XLM)
- Verification Type: Select what information receivers must verify (e.g., PIN, date of birth)
Once you've uploaded your disbursement CSV file and submitted the disbursement, the SDP will begin sending invitations to all receivers in the list.
Step 2: Receiver Creates Passkey
Receivers will receive an invitation message (via SMS or email) with a secure link to create their embedded wallet. The link format looks like this:
https://your-tenant.sdp.stellar.org/wallet?asset=native&token=c09bd254-b77a-4685-bc18-377231484267&signature=26b48d7ce...
When the receiver clicks the link, they'll see a page inviting them to create their wallet account:
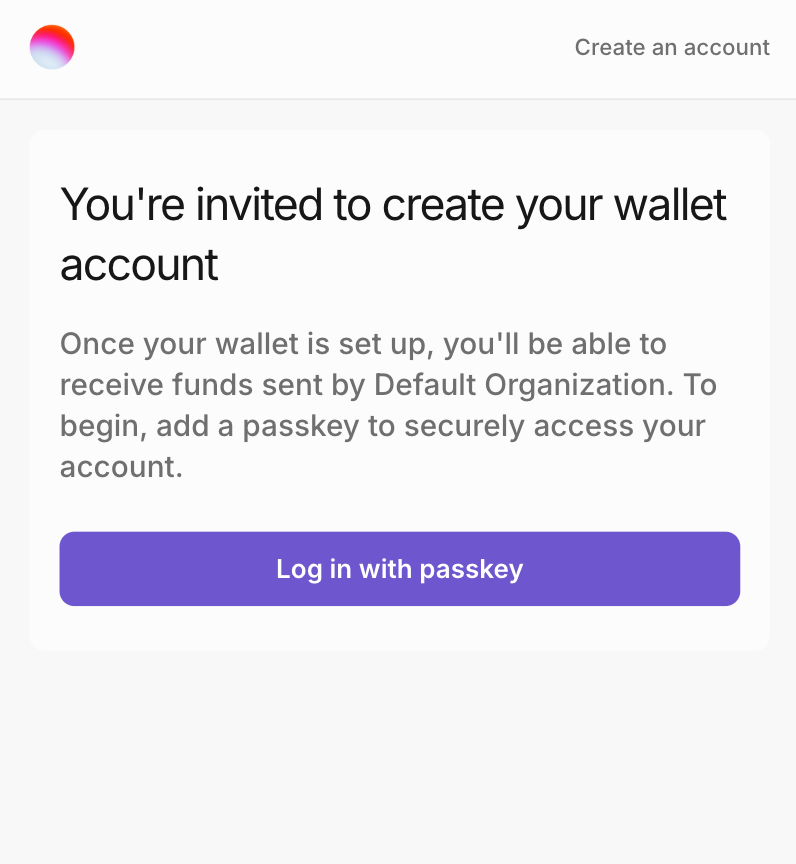
The passkey creation process:
- The receiver clicks "Log in with passkey"
- Their browser or device prompts them to create a passkey (first-time users) or authenticate with an existing passkey (returning users)
- For new users, they'll scan their fingerprint, face, or enter their device PIN
- The browser generates a cryptographic key pair securely on the device
What happens behind the scenes:
- The frontend calls
POST /embedded-wallets/passkey/registration/startwith the invitation token - The backend validates the token and initiates a WebAuthn registration ceremony
- After biometric authentication, the frontend calls
POST /embedded-wallets/passkey/registration/finishwith the credential - The backend queues a smart contract wallet deployment transaction with the public key
- The Transaction Submission Service (TSS) deploys the contract to the Stellar network
- Once deployed, the receiver's wallet is ready to receive funds
If a receiver already has a passkey for a different disbursement, they can simply authenticate with their existing passkey instead of creating a new one. The same passkey can be used across multiple disbursements.
Step 3: Complete Verification
After creating their passkey, receivers are prompted to complete verification before they can receive funds:
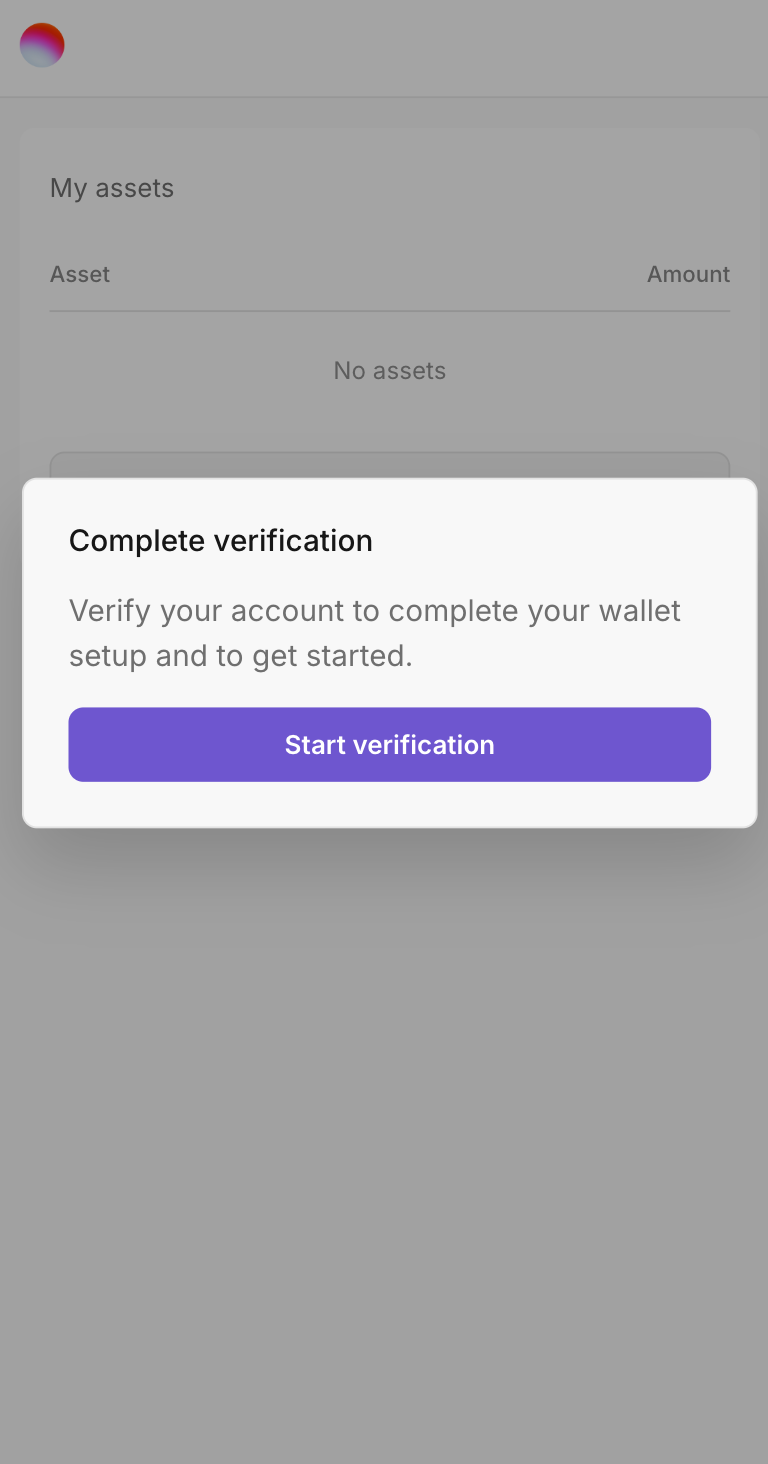
The verification step ensures that the receiver is who they claim to be. Depending on how you configured the disbursement, receivers may need to:
- Enter an OTP (One-Time Password) sent to their email or phone
- Provide their date of birth
- Enter a PIN that was shared with them
- Provide national ID information
What happens after verification:
- The receiver submits their verification information
- The SDP validates the information against the receiver record
- If verification succeeds, the receiver wallet status changes from
READYtoREGISTERED - The SDP automatically initiates the payment to the receiver's contract wallet address
The verification process uses the SDP's native SEP-24 implementation. The receiver authenticates with a SEP-24 JWT token that's generated during the passkey authentication flow.
For background on SEP-45 (contract-account web authentication), see the SEP-45 guide.
Step 4: Receiving Funds
Once verification is complete, the SDP automatically transfers the disbursement amount to the receiver's smart contract wallet address.
Payment Process:
- The SDP queues a payment transaction to the receiver's contract address
- The payment uses a Stellar Asset Contract (SAC) transfer to move funds from the distribution account to the contract wallet
- The transaction is fee-sponsored by the distribution account, so the receiver pays nothing
- Once confirmed on the network, the funds are available in the receiver's embedded wallet
What receivers see:
- The embedded wallet interface displays their asset balance
- They can view their wallet address (a Stellar C-address starting with "C")
- They can initiate transactions to send funds or withdraw to fiat
Embedded wallet addresses are Stellar smart contract addresses (C-addresses) rather than traditional Stellar accounts (G-addresses). They start with "C" instead of "G". For example: CABC123...
:::
External Resources
To learn more about the technologies behind Embedded Wallets, check out these resources:
Passkeys & WebAuthn
- passkeys.dev - Comprehensive guide to passkeys
- WebAuthn Specification - W3C standard for web authentication
- FIDO Alliance - The organization behind passkey standards
Stellar Protocols
- SEP-24: Hosted Deposit and Withdrawal - Interactive deposit/withdrawal flow
- SEP-45: Smart Contract Domain Verification - Web authentication for smart contracts
- Stellar Asset Contract (SAC) - Token standard for Stellar smart contracts
Smart Contracts
- Soroban Documentation - Stellar's smart contract platform
- Contract Address Format - Understanding C-addresses vs G-addresses